
Exporting Render
Contents
Exporting Render#
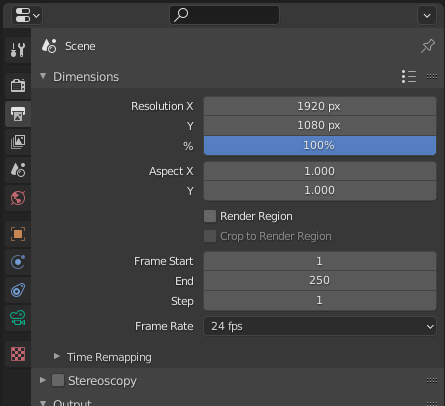
Aspect Ratio / Resolution#
Go to Output Properties on the right side panel and change Resolution X and Resolution Y.
Denoising#
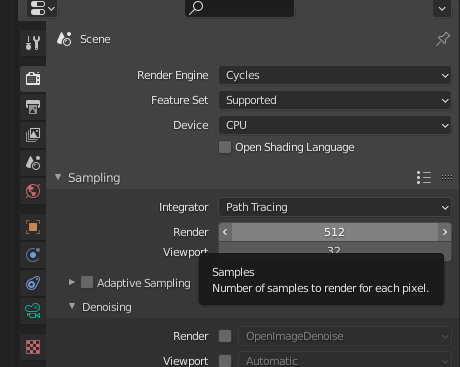
Default settings in Blender using the cycles engine produces lots of noise/fireflies in the final image. Now there are a lot of ways to reduce noise without denoising explained here, but here is a quick way to remove noise with good enough results.
Go to
Render Propertieson the right side panel,Sampling,Denoising, checkRender, and switch fromNLMtoOpenImageDenoise. NVIDIA graphics cards are better for Blender, and have viewport denoising, but you can search that up yourself (it’s very cool).Celebrate
Tile Size#
Optimal tile size (the orange box that moves around when rendering the image) depends on whether you are CPU rendering or GPU rendering. For NVIDIA GPU rendering is much faster, instructions here. For Raedon… GPU rendering doesn’t work as well, but you can try using OpenCL. Now back to tile size, just enable the Auto Tile Size addon by going to Edit, Preferences, Add-ons, type Auto Tile Size in the search box, and check Render: Auto Tile Size.
Samples#
People always talk about sample count, but for basic renders just use 128 or 256 or 512, people can’t tell the difference between that and 2048. In order to change the amount of samples go to Render Properties on the right side panel, Sampling, and change the Render value. You can also change the Viewport value, but don’t make that high.
Exporting / Rendering Image#
Click F12 or on the top go to
Render,Render ImageA window will pop up, and once it’s done rendering, click
Image,Save as
🥳🥳You’re done!!!!!🥳🥳
Now go show it off!
And make sure to tell everyone about this awesome guide!