
Preparing Scene in Blender
Contents
Preparing Scene in Blender#
So this is the big one. Blender has unlimited possibilities, and there are an unlimited amount of things you could do with your render. But here are some basic ways to present your build.
I suggest familiarising yourself with Blender’s controls and layout before preceding, but if you don’t want to then read the next section.
Basic Controls#
Use scroll wheel to zoom in and out
Use joystick looking sphere at the top right to change perspective
Hold middle click and move mouse to change perspective
Hold shift and middle click then move mouse to pan around
Watch this if you don’t understand.
Lighting#
There are two basic ways to light your scene, HDRIs and lights/lamps (sun, area, etc). I will cover using HDRIs, as they provide easy, quick, realistic lighting.
HDRI#
Click
Shadingon top to go to the Shader editorOn the left middle switch shader type from
ObjecttoWorld. You should see in the middle bottom (node editor) the two nodesBackgroundandWorld OutputOn the top left click
Edit,Preferences,Add-onsIn the search bar enter
Node Wranglerand check the box next toNode: Node WranglerGo back to the shader editor and left click
Background, andCTRL + TThe nodes
Texture Coordinate,Mapping, andEnviornment Textureshould pop upDownload a 2k HDRI from Poly Haven
Click
Openon theEnviornment Texturenode, and select your HDRI
Render Engine#
For Minecraft renders it’s best looking to use cycles. As of writing cycles X hasn’t been released with it, but you can mess around with it in alpha.
To enable switch to cycles from eevee (default engine), go to the right side panel in the
Layouteditor, and selectRender Properties,Render Engine, and selectCyclesOn the top right of the 3d viewport click the sphere
Viewport Shading

Camera#
In the
Layouteditor in the3D Viewporton the top left clickAdd,CameraOn the right side of the
3D Viewportclick the camera icon. You are now seeing what the camera sees. Whatever is in the outlined box in the center is whatever will be in the rendered image. In order to leave the camera, click the camera icon againOn the right sidebar click
View,View,View Lock,Lock: checkCamera to ViewNow when you move around the camera will also move around
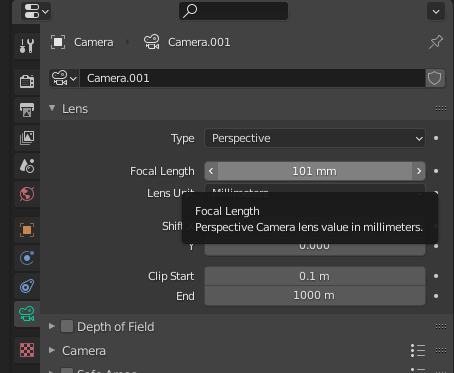
I suggest increasing the camera focal length (like decreasing Minecraft FOV) by selecting the Camera, going to the right side bar, clicking the green camera icon, and changing
Lens,Focal Length
When in Camera or View Parts of the Render are Cut Off?#
This is a common issue and it is because your camera’s or view’s “render distance” is too low, so parts of your render too far away are not visible. This however can be easily fixed.
For Camera Cut Off#
If when you are inside of the camera, looking at what the camera is seeing
Follow step 5 above and the image above, but instead of changing Lens or Focal Length increase
Endvalue underClip Start
For View Cut Off#
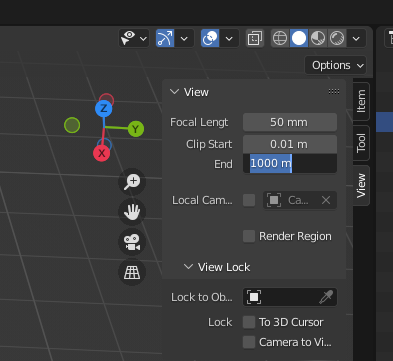
If you are looking at the scene while not in the camera.
If you cannot see
Item,Tool,Viewon a vertical bar at the top right of the3D Viewportclick the small arrow on the top right of the3D ViewportClick
ViewIncrease
Endvalue
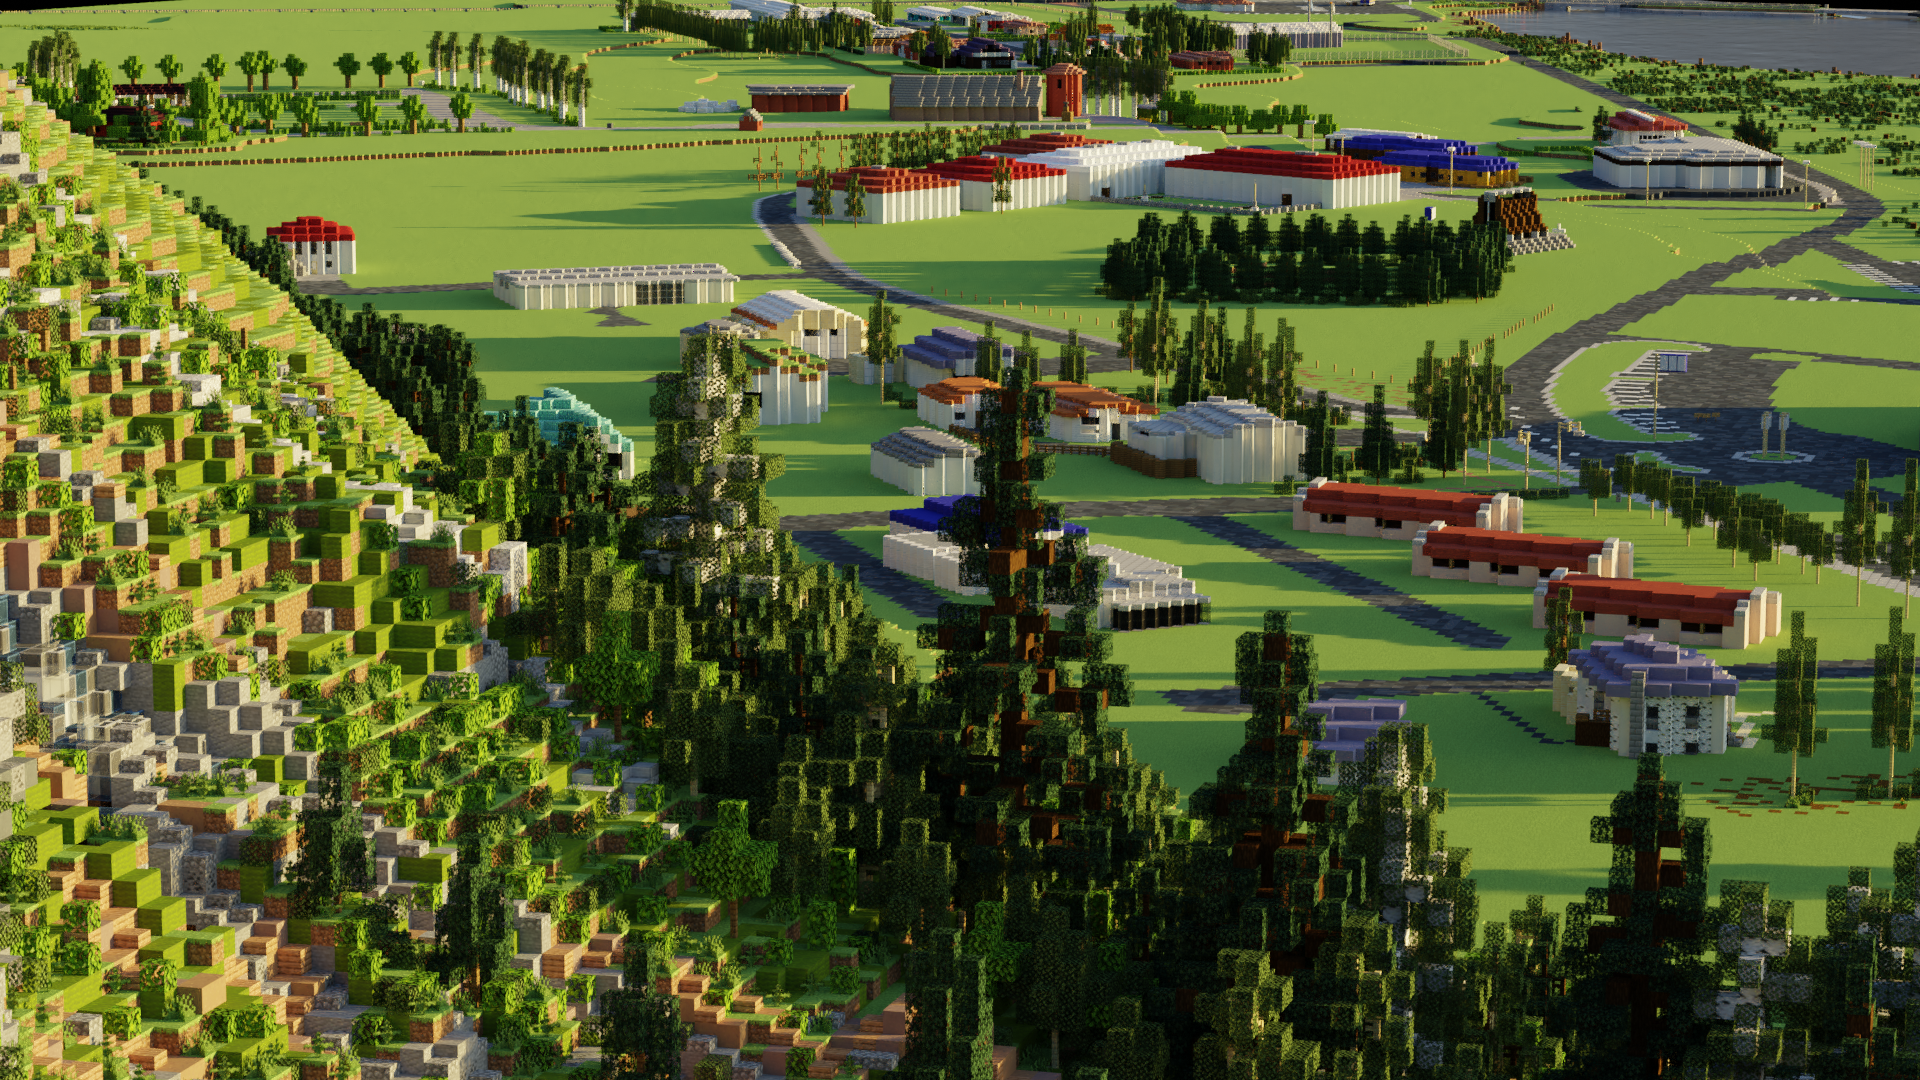
Ground#
One of trillions of possibilities is to only show the Minecraft build’s ground in the image, and another is to make a plane and extend it, another is to use an “Infiinite Background” (explained in the next section).
Background#
You can either use the background of the HDRI, which can sometimes work or sometimes look completely unrealistic, not show anything except the Minecraft build in the image, or hide the HDRI background and use an “infinte background”.
HDRI Background#
Just position the camera where you can only see the ski of the HDRI in the image.
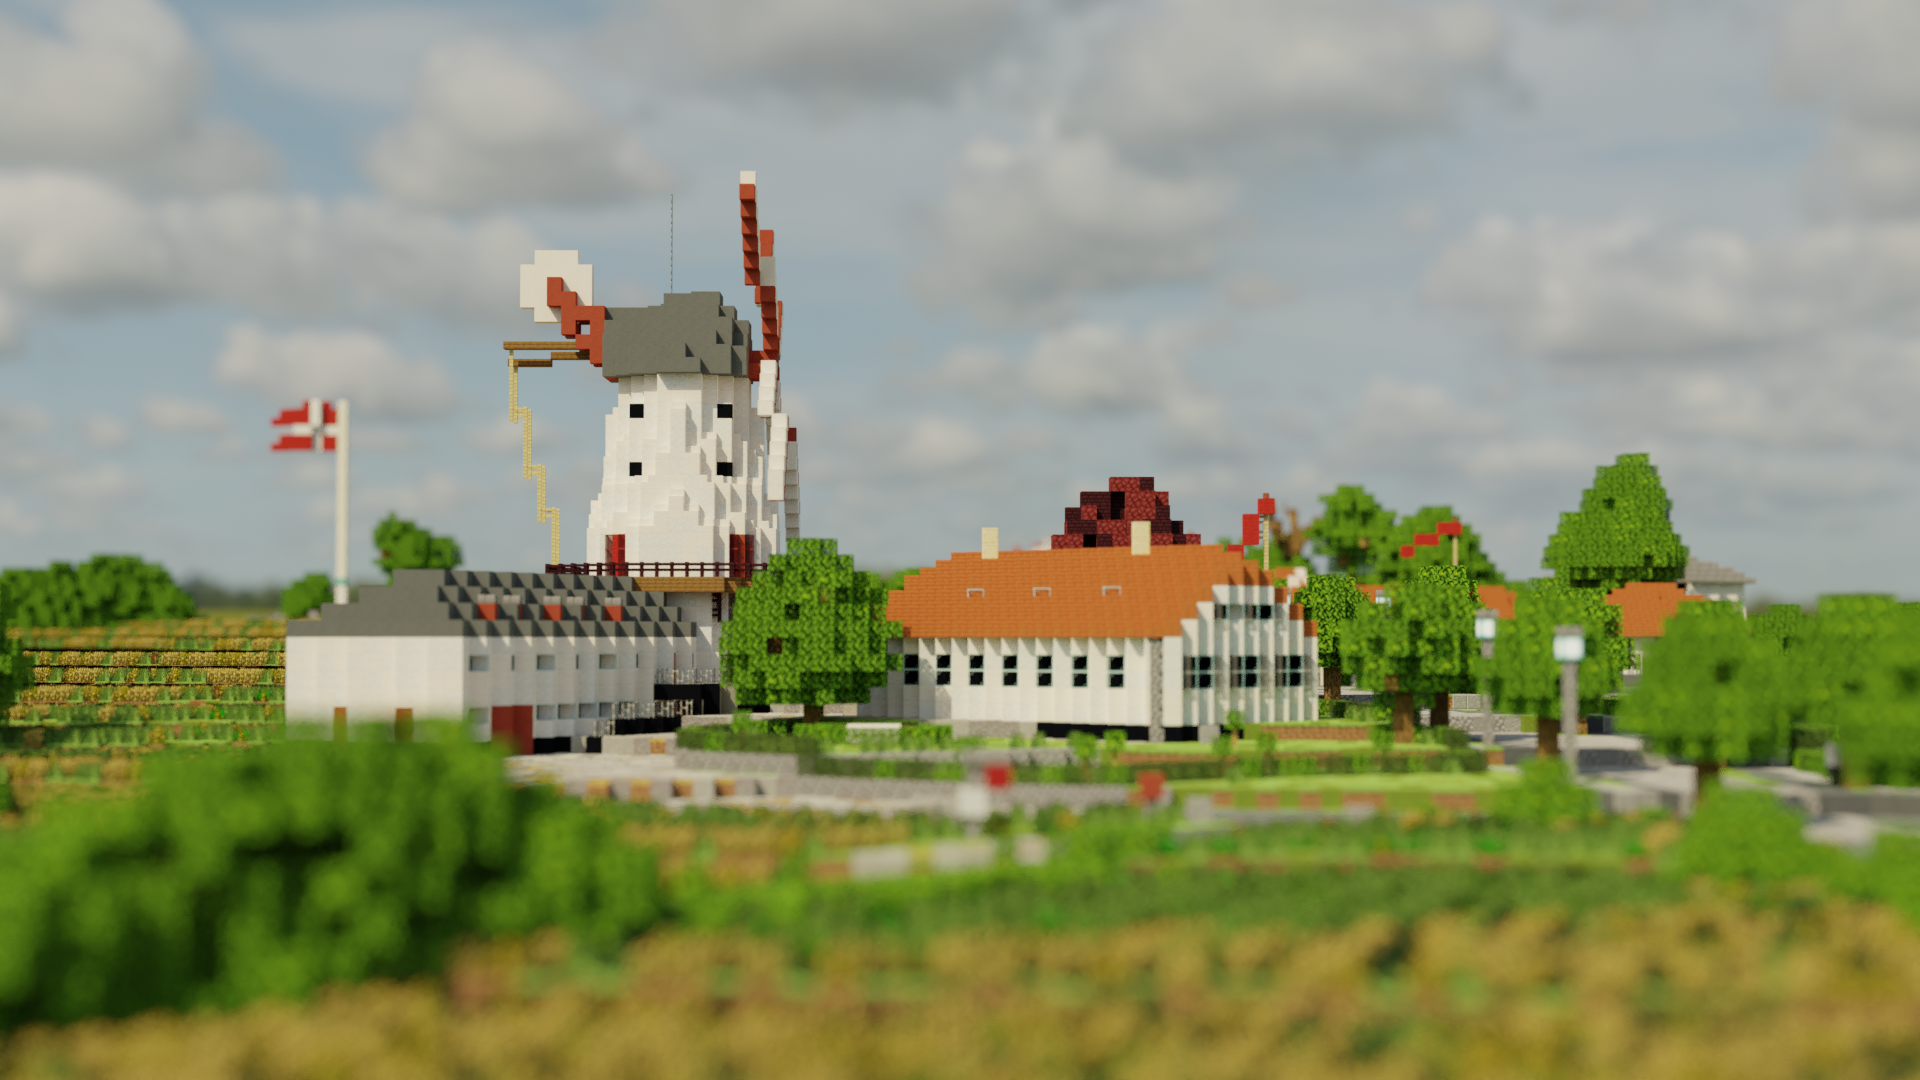
No Background#
Just position the camera where you can only see the Minecraft build in the image.
Infinite Background#
Common techinique in real world photos, now in Blender. Watch this or this or maybe this.
I’m sure I missed some things, if they’re not in the extra page, tell me on Discord. Of course I’m not going to cover every single thing that can be done in Blender.